Uganda Honeymoon Safari: The Ultimate 2026 Guide
21/10/2026
Uganda Safari Photography: Where to Go and How to Get Stunning Wildlife Shots
A lion resting beneath an acacia tree, a mountain gorilla emerging through misty rainforest, or a shoebill standing silently in a papyrus swamp can become the defining image of an African adventure. Capturing these moments takes more than an expensive camera. It takes the right location, good timing, patience, and an understanding of animal behaviour.
Uganda safari photography offers an exceptional range of subjects, from open savannah and dramatic waterfalls to dense tropical forests, wetlands, and mountain landscapes. This variety makes Uganda attractive to beginners, wildlife enthusiasts, bird photographers, and experienced photographers seeking a diverse portfolio.
The challenge is choosing the right parks and preparing for very different lighting conditions. A lens that performs brilliantly on an open game drive may struggle beneath a forest canopy. Likewise, photographing a distant eagle requires a different approach from composing a landscape around Murchison Falls.
This guide explains where to photograph Uganda’s wildlife, what equipment to carry, how to improve your camera settings, and how to photograph animals responsibly. It also shows how a well-planned photography itinerary can help you make better use of your time in the Pearl of Africa.
Quick Facts: Uganda Safari Photography at a Glance

Queen Elizabeth National Park and Murchison Falls National Park offer varied savannah wildlife, river scenery, and opportunities for landscape photography.

Bwindi Impenetrable National Park for mountain gorillas and Kibale Forest for chimpanzees.

Mabamba Swamp, Queen Elizabeth National Park, and Murchison Falls National Park provide varied wetland and birding opportunities.

A telephoto zoom, a versatile standard zoom, spare batteries, memory cards, and rain protection.

Early morning and late afternoon generally provide softer light for open-country wildlife and landscapes.
1. Best Places for Wildlife Photography in Uganda
The strongest photography itinerary combines several habitats rather than spending the entire trip in one national park. Open grasslands, rainforest, wetlands, and waterways produce different subjects and photographic styles.
Queen Elizabeth National Park: Diverse wildlife and landscapes

The Ishasha sector is especially interesting because of its tree-climbing lions. Photographing them in the branches of large fig trees creates a different composition from the usual lion portrait on open ground.
The Kazinga Channel adds another dimension. A boat safari can offer views of hippos, elephants near the water, buffalo, and numerous waterbirds.
Photography tip: Take both a telephoto lens for close portraits and a wider lens for animals in their surroundings. Early-morning and late-afternoon game drives are usually the best starting points for soft, directional light.
Murchison Falls National Park: Wildlife and dramatic scenery

Photographers can look for giraffes, elephants, antelope, buffalo, and a variety of birds on game drives. Boat trips on the Nile offer opportunities to photograph waterbirds, hippos, crocodiles, and river scenery.
The waterfall itself deserves more than one photograph. Try a wide composition that shows the surrounding landscape, then capture tighter frames of the rushing water and spray.
Photography tip: Protect your camera against dust during game drives and water spray near the falls. A protective filter may help against splashes, but a clean lens cloth and a waterproof camera cover are more important.
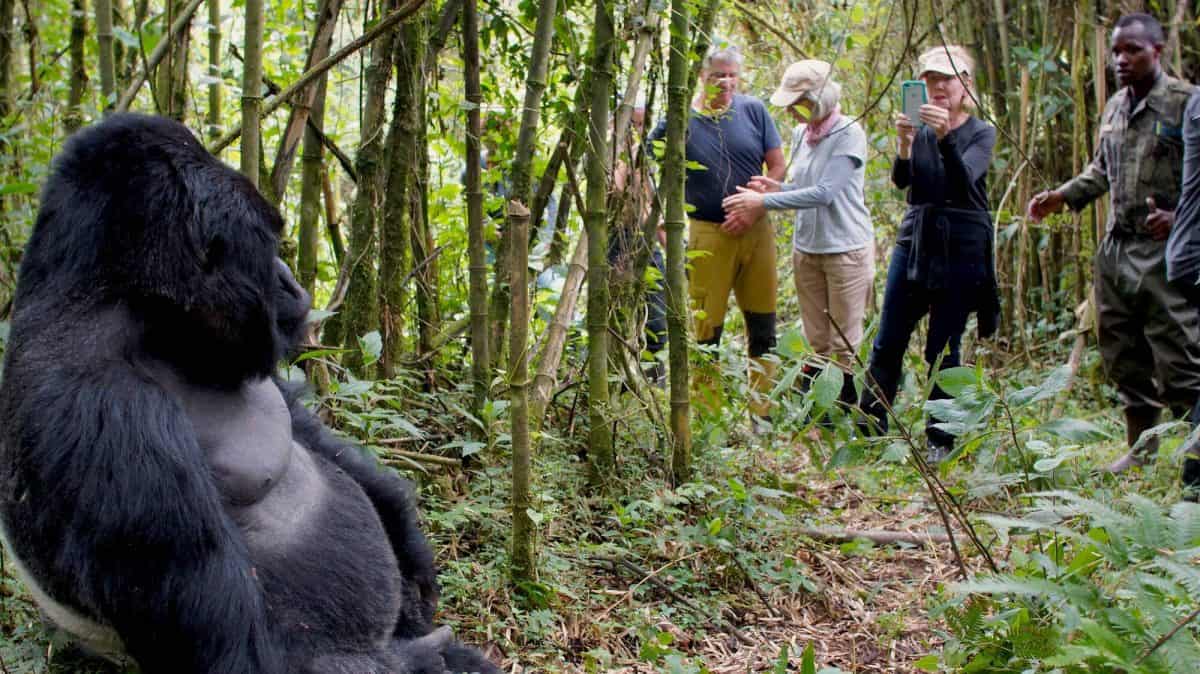
Bwindi Impenetrable National Park: Mountain gorilla photography

However, forest photography can be difficult. Thick vegetation blocks light, branches interrupt the frame, and animals may move between patches of shadow. A camera that performs well in bright sunlight can produce blurred or noisy photographs under these conditions.
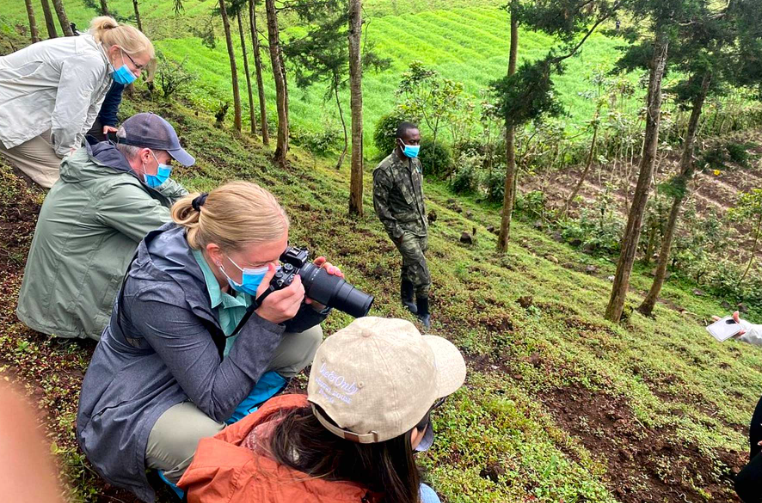
Gorilla trekking is also a regulated wildlife encounter, not a private photo session. Visitors must follow their guide’s instructions, respect the required distance, and never use flash.
Photography tip: Prepare your settings before reaching the gorillas. A fast lens, a sufficiently high ISO, and a shutter speed suited to movement will improve your chances of capturing sharp images without disturbing the animals.
Kibale Forest: Chimpanzees and forest birds

Forest bird photography is another attraction. The green surroundings can create beautiful backgrounds, but leaves and branches can also make autofocus less reliable.
Photography tip: Use continuous autofocus when following moving subjects. If your camera supports animal-eye detection, test it before your trip. Be ready to reposition slightly rather than forcing a shot through a cluttered foreground.
Mabamba Swamp: A special destination for bird photographers

Bird photography rewards patience more than constant movement. A skilled local bird guide can help identify promising areas and explain bird behaviour, while a steady camera and a suitable telephoto lens help capture fine details.
Photography tip: Plan an early departure and keep your equipment protected from moisture. Ask your boat operator to approach wildlife carefully and never pressure a guide to disturb a bird for a closer photograph.
2. What Is the Best Camera Gear for a Uganda Photography Safari?
You do not need the most expensive camera on the market to take memorable wildlife photographs. You need equipment that suits the subjects, handles difficult light, and remains comfortable to carry throughout your safari.
Choosing the right camera and lenses
Here is a practical equipment comparison.
| Equipment | Best use | What to consider |
|---|---|---|
| 100–400mm zoom | General wildlife and safari photography | Versatile focal range |
| 70–200mm f/2.8 | Gorillas and other low-light subjects | Wide aperture; heavier and expensive |
| 300–600mm lens | Distant wildlife and birds | Greater reach, more weight |
| 24–70mm zoom | Landscapes and environmental portraits | Useful for scenery and wider compositions |
| Monopod or beanbag | Vehicle-based photography | Stability for heavier lenses |
| Rain cover and dry bags | Forests and wet weather | Protects against moisture and dust |
For many visitors, a 100–400mm lens is a strong all-round choice. If gorillas and chimpanzees are the main focus, a wider-aperture lens can be more useful in dark forest conditions. Dedicated bird photographers may benefit from longer focal lengths, provided they can manage the weight.
Essential accessories to pack
-
Two or more spare batteries, particularly for long days away from charging points.
-
Multiple memory cards, so a full card does not end a productive game drive.
-
A rain cover and dry bag for sudden showers and damp forest conditions.
-
A soft microfiber cloth and a blower for removing dust from equipment.
-
A comfortable camera strap or harness for walking and trekking.
-
Binoculars for locating animals before raising your camera.
Avoid changing lenses unnecessarily in dusty vehicles or damp forest conditions. If you carry a second camera body, you can switch focal lengths quickly without exposing the sensor to the environment.
3. Best Camera Settings for Uganda Safari Photography
The correct settings depend on the light, the animal’s movement, and the lens you are using. The values below are starting points, not rules that work in every situation.
| Photography situation | Starting shutter speed | Suggested approach |
|---|---|---|
| Stationary large mammals | 1/500 sec | Increase speed if the animal moves |
| Running animals | 1/1,000–1/2,000 sec | Continuous autofocus and burst shooting |
| Birds in flight | 1/1,600 sec or faster | Track the bird and use continuous autofocus |
| Gorillas in dim forest | 1/250–1/500 sec | Fast aperture and higher ISO |
| Landscapes on a tripod | 1/60 sec or slower, as needed | Stabilize the camera and watch highlights |
These are practical starting points. Fast movement, long focal lengths, and poor light may require faster shutter speeds or higher ISO settings.
Use aperture to control light and background
A wide aperture, such as f/2.8 or f/4, allows more light to reach the sensor. It can also separate an animal from a distracting background.
However, very shallow depth of field can leave parts of an animal’s face out of focus. When photographing two animals together or an animal with prominent horns, you may need a narrower aperture.
Raise ISO when light is limited
Do not automatically keep ISO low at the expense of a sharp photograph. A noisy but sharp image is often more useful than a clean image blurred by movement.
Under a rainforest canopy, ISO 1600–6400 may be necessary depending on your camera, lens, and available light. Check the results on your camera screen and adjust exposure before the moment passes.
Shoot RAW and use burst mode selectively
RAW files preserve more flexibility for adjusting exposure, shadows, and white balance during editing. Burst mode helps when an animal is moving, interacting, or displaying a brief behaviour.
Neither setting replaces good timing. Follow the animal’s behaviour, focus on the eyes when possible, and take short bursts rather than filling your memory cards with hundreds of nearly identical frames.
4. Practical Wildlife Photography Tips That Make a Difference

Photograph during the best light
In open savannah, the hours shortly after sunrise and before sunset often provide softer light, warmer colours, and more attractive shadows. Harsh midday light can create bright highlights and deep shadows on animal faces.
Forest photography is different. The canopy creates shade throughout the day, so the priority is often finding a clear view and exposing the subject correctly rather than waiting for golden hour.
Focus on animal behaviour
Instead of taking only portraits, watch for interactions. Elephants may greet one another, birds may feed their young, and primates may groom or play.
Learn the signs that an animal is about to move. With practice, anticipating a behaviour gives you more time to compose the photograph and choose an appropriate shutter speed.
Compose beyond the animal’s face
A tight portrait can be powerful, but it should not be the only photograph you make. Try including the landscape, a reflection, a tree, or the animal’s surroundings.
Leave space in the direction the animal is looking or moving. Look for clean backgrounds and avoid branches appearing to grow out of an animal’s head.
Work with your safari guide
A knowledgeable local guide can help you identify wildlife, understand tracks and behaviour, and position the vehicle responsibly. Explain your photography priorities before the drive begins.
If photography is your main objective, discuss a private vehicle or a dedicated photography itinerary. This can give you more flexibility to wait for suitable light and compose a shot without rushing other passengers.
Review photographs without missing the experience
Check focus, exposure, and battery levels during breaks. Avoid spending every moment reviewing images while wildlife is active.
The aim is to bring home a strong collection of photographs while remaining attentive to the experience itself.
5. Uganda Bird Photography: Techniques for Sharper Image
Uganda’s varied habitats support an exceptional diversity of birdlife. The Uganda Wildlife Authority describes the country as having more than 1,060 recorded bird species, making it an attractive destination for birders and photographers alike.
Bird photography requires different techniques from photographing larger mammals. Birds are smaller, often more distant, and may move suddenly between branches or fly away just as you achieve focus.
Choose your position before shooting
Look for a clear line of sight and a background that separates the bird from surrounding vegetation. Whenever possible, position yourself with the sun behind you or to the side, while avoiding unnecessary disturbance.
A bird against a clean background is often easier to photograph effectively than one hidden among tangled branches.
Prioritize shutter speed and autofocus
For perched birds, start around 1/1,000 sec when light allows. For birds in flight, 1/1,600 sec or faster is a useful starting point.
Use continuous autofocus to follow movement. If your camera has bird detection, enable it and practise tracking birds before your trip.
Plan for a variety of species
Mabamba Swamp is worth considering for shoebills. Queen Elizabeth National Park offers waterbirds and savannah species, while Murchison Falls adds river habitats and open-country birds.
For forest specialists, Kibale and Bwindi provide opportunities that differ greatly from wetland photography. A local bird guide can help you allocate time according to your target species rather than relying on chance sightings.
6. Gorilla Photography Tips: Photograph Responsibly

Photographing mountain gorillas is one of the most distinctive experiences available on a Uganda safari. It also requires particular care because the animals are vulnerable to human disturbance and disease transmission.
Prepare before the trek
Set your camera to a suitable exposure mode, charge your batteries, and keep your equipment accessible without carrying unnecessary weight. A 70–200mm lens can be useful for portraits and small family groups, while a versatile zoom may suit different viewing distances.
Do not rely on flash to brighten the forest. Use a wider aperture, increase ISO when needed, and select a shutter speed appropriate for the gorillas’ movements.
Follow the rules and your guide
-
Never use flash or lighting equipment during gorilla encounters.
-
Maintain the distance required by the current Uganda Wildlife Authority guidance and follow your ranger’s instructions.
-
Stay with your trekking group and do not approach or follow gorillas independently.
-
Keep quiet and avoid sudden movements.
-
Stop photographing when instructed, and put the camera away if safety or animal welfare requires it.
Official rules and permit conditions should be checked before travel, as requirements can change. Gorilla permits also need to be arranged in advance, particularly for popular dates.
Capture more than a close-up
A photograph of a gorilla’s face can be striking, but a wider image showing the forest, a mother with her young, or the group’s interaction may tell a more complete story.
Remember that you have limited time with the animals. Prioritize a few thoughtful compositions instead of trying to photograph every movement.
7. Best Time to Visit Uganda for Photography
Uganda is close to the equator, and wildlife photography is possible throughout the year. However, weather, road conditions, vegetation, and your preferred subjects can influence when you should travel.
| Period | Photography advantages | Considerations |
|---|---|---|
| June–August | Often drier conditions for game drives and trekking | Popular travel period; book early |
| December–February | Often favourable for savannah wildlife photography | Weather can still vary |
| March–May | Lush landscapes and atmospheric forest conditions | More rain and potentially muddy trails |
| September–November | Green scenery and interesting birding opportunities | Rain may affect access and shooting plans |
These are broad seasonal patterns, not guarantees. Conditions vary by region and year, and rainfall can occur even during traditionally drier months.
For a mixed wildlife and landscape trip, consider combining a savannah park with a forest destination. If birds are your main interest, select dates and locations around target species and habitat rather than relying only on the dry-season calendar.
8. Suggested Uganda Photography Safari Itinerary
A well-planned route gives you time to photograph wildlife without spending every day travelling between parks. The right itinerary depends on your budget, target species, trekking plans, and how much time you want to spend at each sighting.

Focus on wetland birds, shoebills, and landscapes around Lake Victoria. Use an early start for bird photography and allow time for transfers and equipment preparation.

Photograph savannah wildlife, the Nile River, birds, and the waterfall. Combine morning game drives with a boat safari when practical.

Concentrate on chimpanzees and forest wildlife. Allow flexibility because animal movements and forest light are unpredictable.

Look for lions, elephants, buffalo, birds, and river scenes. Include the Kazinga Channel and, if conditions permit, the Ishasha sector.

Finish with a planned gorilla trek, forest photography, and time to explore the surrounding landscape. Confirm permits and travel logistics before finalizing the route.
This 12-day outline is a starting point, not a fixed schedule. Driving times, road conditions, accommodation locations, permit availability, and the time needed for wildlife activities can require adjustments.
For the best results, work with a local safari operator to plan transfers, park activities, and accommodation around your photography priorities.
9. Common Photography Mistakes to Avoid
Even experienced photographers can lose valuable opportunities through poor preparation. Avoid these common mistakes when planning your Uganda safari photography trip.
-
Using a shutter speed that is too slow: Wildlife moves unexpectedly. Check your shutter speed before a sighting rather than discovering motion blur later.
-
Packing too much equipment: Heavy bags make forest treks and long game drives tiring. Choose lenses based on your planned activities.
-
Ignoring rain protection: Moisture and condensation can affect cameras and lenses. Keep equipment protected when moving between air-conditioned vehicles, humid forests, and outdoor environments.
-
Chasing the closest possible view: A tighter frame is not worth disturbing an animal or breaking park rules. Work with your guide and use the available focal length.
-
Planning too many destinations: Excessive driving leaves less time for photography. Spend longer in locations that match your goals.
-
Forgetting backups: Carry spare batteries and memory cards, and back up important images when you have a secure opportunity.
The biggest improvement often comes from slowing down, anticipating behaviour, and understanding the conditions rather than buying another lens.
Frequently Asked Questions
1. What is the best national park for Uganda safari photography?
Queen Elizabeth National Park is an excellent all-round choice for savannah wildlife, birds, boat photography, and landscapes. Murchison Falls National Park is particularly attractive for river scenery and large mammals. Bwindi is best suited to mountain gorilla photography, while Kibale is a strong choice for chimpanzees and forest wildlife. The best park depends on your target subjects.
2. What camera lens is best for wildlife photography in Uganda?
A 100–400mm zoom is a versatile starting point for many wildlife photographers. It offers useful reach for game drives while remaining more manageable than many very long telephoto lenses. For gorillas and other subjects in dim forest conditions, a 70–200mm f/2.8 may be more useful. Bird specialists may prefer a longer lens, depending on their equipment and target species.
3. Can I take photographs of mountain gorillas in Uganda?
Yes, visitors can photograph mountain gorillas during authorized trekking experiences, provided they follow the current rules and ranger instructions. Flash photography is prohibited, and visitors must respect the required viewing distance. Prepare your camera before the encounter, use available light, and avoid actions that could disturb the gorillas.
4. What is the best month for wildlife photography in Uganda?
June through August and December through February are commonly preferred for many savannah safari activities because conditions are often drier. However, Uganda offers photography opportunities throughout the year. Rainy periods can provide lush scenery and interesting birding conditions, although muddy trails and wet weather may complicate travel.
5. Is Uganda suitable for bird photography?
Yes. Uganda has diverse bird habitats, including wetlands, tropical forests, lakeshores, and savannah. Mabamba Swamp is a well-known destination for shoebills, while Queen Elizabeth National Park, Murchison Falls National Park, Bwindi, and Kibale offer different birding opportunities. A specialist guide can help you plan around target species and suitable habitats.
6. How many days do I need for a Uganda photography safari?
Five to seven days can work for a focused trip covering one or two nearby destinations. Around 10–14 days offers more flexibility for combining savannah wildlife, forest primates, birding, and landscapes. Allow additional time if your priorities include specialist bird photography, multiple gorilla trekking activities, or a relaxed pace with longer sessions at sightings.
7. Can beginners enjoy a Uganda photography safari?
Absolutely. You can take memorable photographs with an entry-level camera or smartphone. Learn the basics of focus, exposure, and composition before travelling, and choose an itinerary that suits your experience. A knowledgeable guide can help you locate wildlife and understand animal behaviour, while a flexible schedule gives you time to practise.
Conclusion: Plan Your Uganda Safari Photography Adventure
The best wildlife photographs come from combining the right locations, suitable equipment, patient observation, and respect for animals. Queen Elizabeth and Murchison Falls offer rewarding savannah and river photography, while Bwindi, Kibale, and Mabamba provide opportunities for primates, forest wildlife, and birds.
Before travelling, choose your priority subjects, prepare your camera for different lighting conditions, and leave enough time to enjoy each destination. A carefully planned route will usually produce better results than trying to visit every park in a short period.
Uganda safari photography can be rewarding for beginners and experienced photographers alike. Bigodi Africa Expeditions can help you plan a safari around your interests, from mountain gorilla encounters to wildlife game drives and specialist birding. Get in touch to discuss your photography goals, arrange your itinerary, and start planning your unforgettable African adventure.